
Creating a New Affiliate
This guide will help you, as the admin of a company, enable affiliates to self-register with your company.
You can choose between two deep linking methods:
- Branch.io – Automatically generate deep links using the Branch.io bulk link creation process.
- Other Deep Linking Platforms – Manually enter a comma-separated list of deep links.
If you wish to manually create a single affiliate instead, see Creating an Affiliate (Admin Creation).
1. Choosing a Deep Linking Platform
When creating bulk affiliate links, first select whether you are using:
- Branch.io – If your deep links are generated via Branch.io.
- Other Platforms – If you already have deep links and want to upload them directly.
After selecting a platform, follow the relevant steps below.
2. Creating Multiple Deep Links for Affiliate Signup
Method 1: Using Branch.io
If you are using Branch.io for deep linking, follow these steps:
-
Download the CSV Template
- Visit the Create a New Affiliate page.
- Select Enable Affiliate Self-Signup and download the "personal Deep Link CSV template" with the download button.
-
Generate Links in Branch.io
- Go to the Branch Bulk Links Manager.
- Upload the CSV file and press Create Links.
-
Export the Generated Deep Links
- Go to the Branch Export Deep Links.
- Export the deep links you just created (select today’s date for easiest filtering).
-
Upload to Insert Affiliate
- Return to the Insert Affiliate platform and upload the exported deep links CSV.
Once uploaded, these deep links will automatically be assigned to affiliates when they sign up.
Method 2: Using Any Other Deep Linking Platform
If you are using another deep linking platform, follow these steps:
- Enter Your Deep Links
- On the Create a New Affiliate page, select Enable Affiliate Self-Signup.
- Instead of downloading a template, enter a comma-separated list of deep links.
- Example format:
https://your-deeplink.com/abc123, https://your-deeplink.com/xyz789
- Submit Your Deep Links
- Click Submit to upload the deep links.
- These will be stored and automatically assigned to affiliates when they register.
3. Affiliate Signup Requirements
To sign up as an affiliate, users need to know your company name within the Insert Affiliate platform.
To find your company name:
- Go to the Settings Page (General tab).
- Share your company name with affiliates so they can register.
4. Affiliate Signup Process
Affiliates can sign up by following these steps:
- Visit the Signup Page
- Direct affiliates to Insert Affiliate Signup.
- Enter Your Company Name
- They must enter your company name exactly as it appears in Insert Affiliate.
- Deep Link Assignment
- Upon signup, the affiliate will automatically receive one of the pre-generated deep links.
- They can start sharing this link to earn commissions for your company.
4.5. Embedding the Affiliate Signup Form on Your Website (Optional)
You can allow affiliates to register directly from your own website by embedding the Insert Affiliate sign-up form as an iFrame.
How to Use the iFrame Embed Widget:
- Go to the Settings page (Branding tab) and find the Affiliate self-signup form section.
- Under Appearance, customise the background, text and button colours, and optionally set a custom form title — or toggle Sync embed with brand colour to have the embed use your brand colour automatically instead.
- Check the Embed preview to see how the form will look.
- In the Embed code section, click Copy embed code.
- Paste it into your website's HTML where you want the sign-up form to appear.
Example Embed Code:
<iframe
  src="https://app.insertaffiliate.com/signup/affiliate-signup-iframe?companyName=YOUR_COMPANY_NAME&backgroundColor=%23ffffff&textColor=%23000000"
  style="width:100%; height:600px; border:none;"
></iframe>
4.6. Custom Deep Links (Optional)
If your affiliates already have their own deep links — for example, from AppsFlyer, Branch.io, or another provider — you can bypass the unassigned deep link pool entirely. Instead of assigning a link from your pool, the affiliate's own deep link is used directly.
This is done by adding the deeplink parameter to your signup URL (both the hosted signup page and the iFrame embed).
Option 1: Prefill a specific deep link
Use this when you already know the deep link for a particular affiliate. The link is passed silently — the affiliate will not see or edit it during signup.
Add &deeplink= followed by the URL-encoded deep link to your signup URL:
...affiliate-signup-iframe?companyName=YOUR_COMPANY_NAME&deeplink=https%3A%2F%2Fmyapp.onelink.me%2Fabc123
Option 2: Let the affiliate enter their own deep link
Use this when each affiliate has their own link but you don't know it in advance. A text input will appear on the signup form for the affiliate to type their deep link URL.
Add &deeplink=null to your signup URL:
...affiliate-signup-iframe?companyName=YOUR_COMPANY_NAME&deeplink=null
Important notes
- When a custom deep link is provided, no links are taken from your unassigned deep link pool.
- The deep link URL must use HTTPS.
- This works with any deep link provider (AppsFlyer OneLink, Branch.io, Insert Links, etc.).
- Custom deep links also work with the hosted signup page URL, not just the iFrame embed.
- You can find example URLs and documentation for these parameters on the Create a New Affiliate page under Custom Deep Links.
4.7. Setting the Embed Language (Optional)
The embedded sign-up form is available in English, Portuguese and Spanish. By default, it detects the visitor's browser language automatically, but you can set it directly if you'd rather it always match your own website.
Option 1: Set the language when the embed loads
Add &lang= followed by a language code to your iFrame's src URL:
...affiliate-signup-iframe?companyName=YOUR_COMPANY_NAME&lang=pt
Supported language codes:
en– Englishpt– Portuguesees– Spanish
Option 2: Change the language after the embed has loaded
You can update the embed's language without reloading the form. From your website's JavaScript, send a message to the iframe:
<script>
  document.querySelector('iframe').contentWindow.postMessage(
    { type: 'insertAffiliateSetLanguage', lang: 'pt' },
    'https://app.insertaffiliate.com'
  );
</script>
The embed switches language immediately, without losing anything the affiliate has already entered into the form.
Using both together
If your website has its own language picker, the two options above are designed to work together:
- On page load, set
&lang=in the iFrame'ssrcURL to whichever language is currently selected in your language picker, so the embed opens already matching your site. - When the visitor changes the language picker afterwards, listen for that change on your site and forward it to the embed with
postMessage, so the form updates to match without reloading the iframe.
This keeps the embed in sync with your site's language at every point — both on first load and any time the visitor changes it.
Important notes
- If no language is set, the form falls back to the visitor's browser language, or English if that isn't supported.
- This only applies to the embedded iFrame. The hosted sign-up page (https://app.insertaffiliate.com/signup/affiliate) has its own language switcher for the affiliate to use directly.
5. Requiring Affiliate Approval
By default, affiliates are approved instantly when they sign up. If you want to review and manually approve each affiliate before they gain access, you can enable Require Affiliate Approval.
Enabling Approval
- Go to the Settings Page (Payments & Payouts tab).
- Toggle Require Affiliate Approval to on.
When enabled, new affiliate signups will be held in a Pending state instead of being granted immediate access.
What Happens When an Affiliate Signs Up (Approval Enabled)
- The affiliate fills out the signup form as normal.
- Instead of being logged in, they see a confirmation message: "Application Submitted - Pending Approval".
- No account or deep link is assigned yet — these are created only once you approve them.
- A pending application is stored for your review.
- You will receive an email notification with the applicant's details and a link to review their application.
Reviewing Pending Affiliates
- Go to Manage Affiliates in your dashboard.
- You will see a Pending Affiliates tab showing all applications awaiting review.
- For each pending affiliate you can:
- Approve — Creates their account, assigns a deep link, and sends them a welcome email with login details.
- Reject — Removes the application. The applicant is not notified automatically.
What Happens on Approval
When you approve a pending affiliate:
- A Firebase Auth account is created for them.
- A deep link is assigned from your available pool.
- They receive a welcome email with their login details. You can customise this email from Settings.
- They can then sign in and start promoting your app.
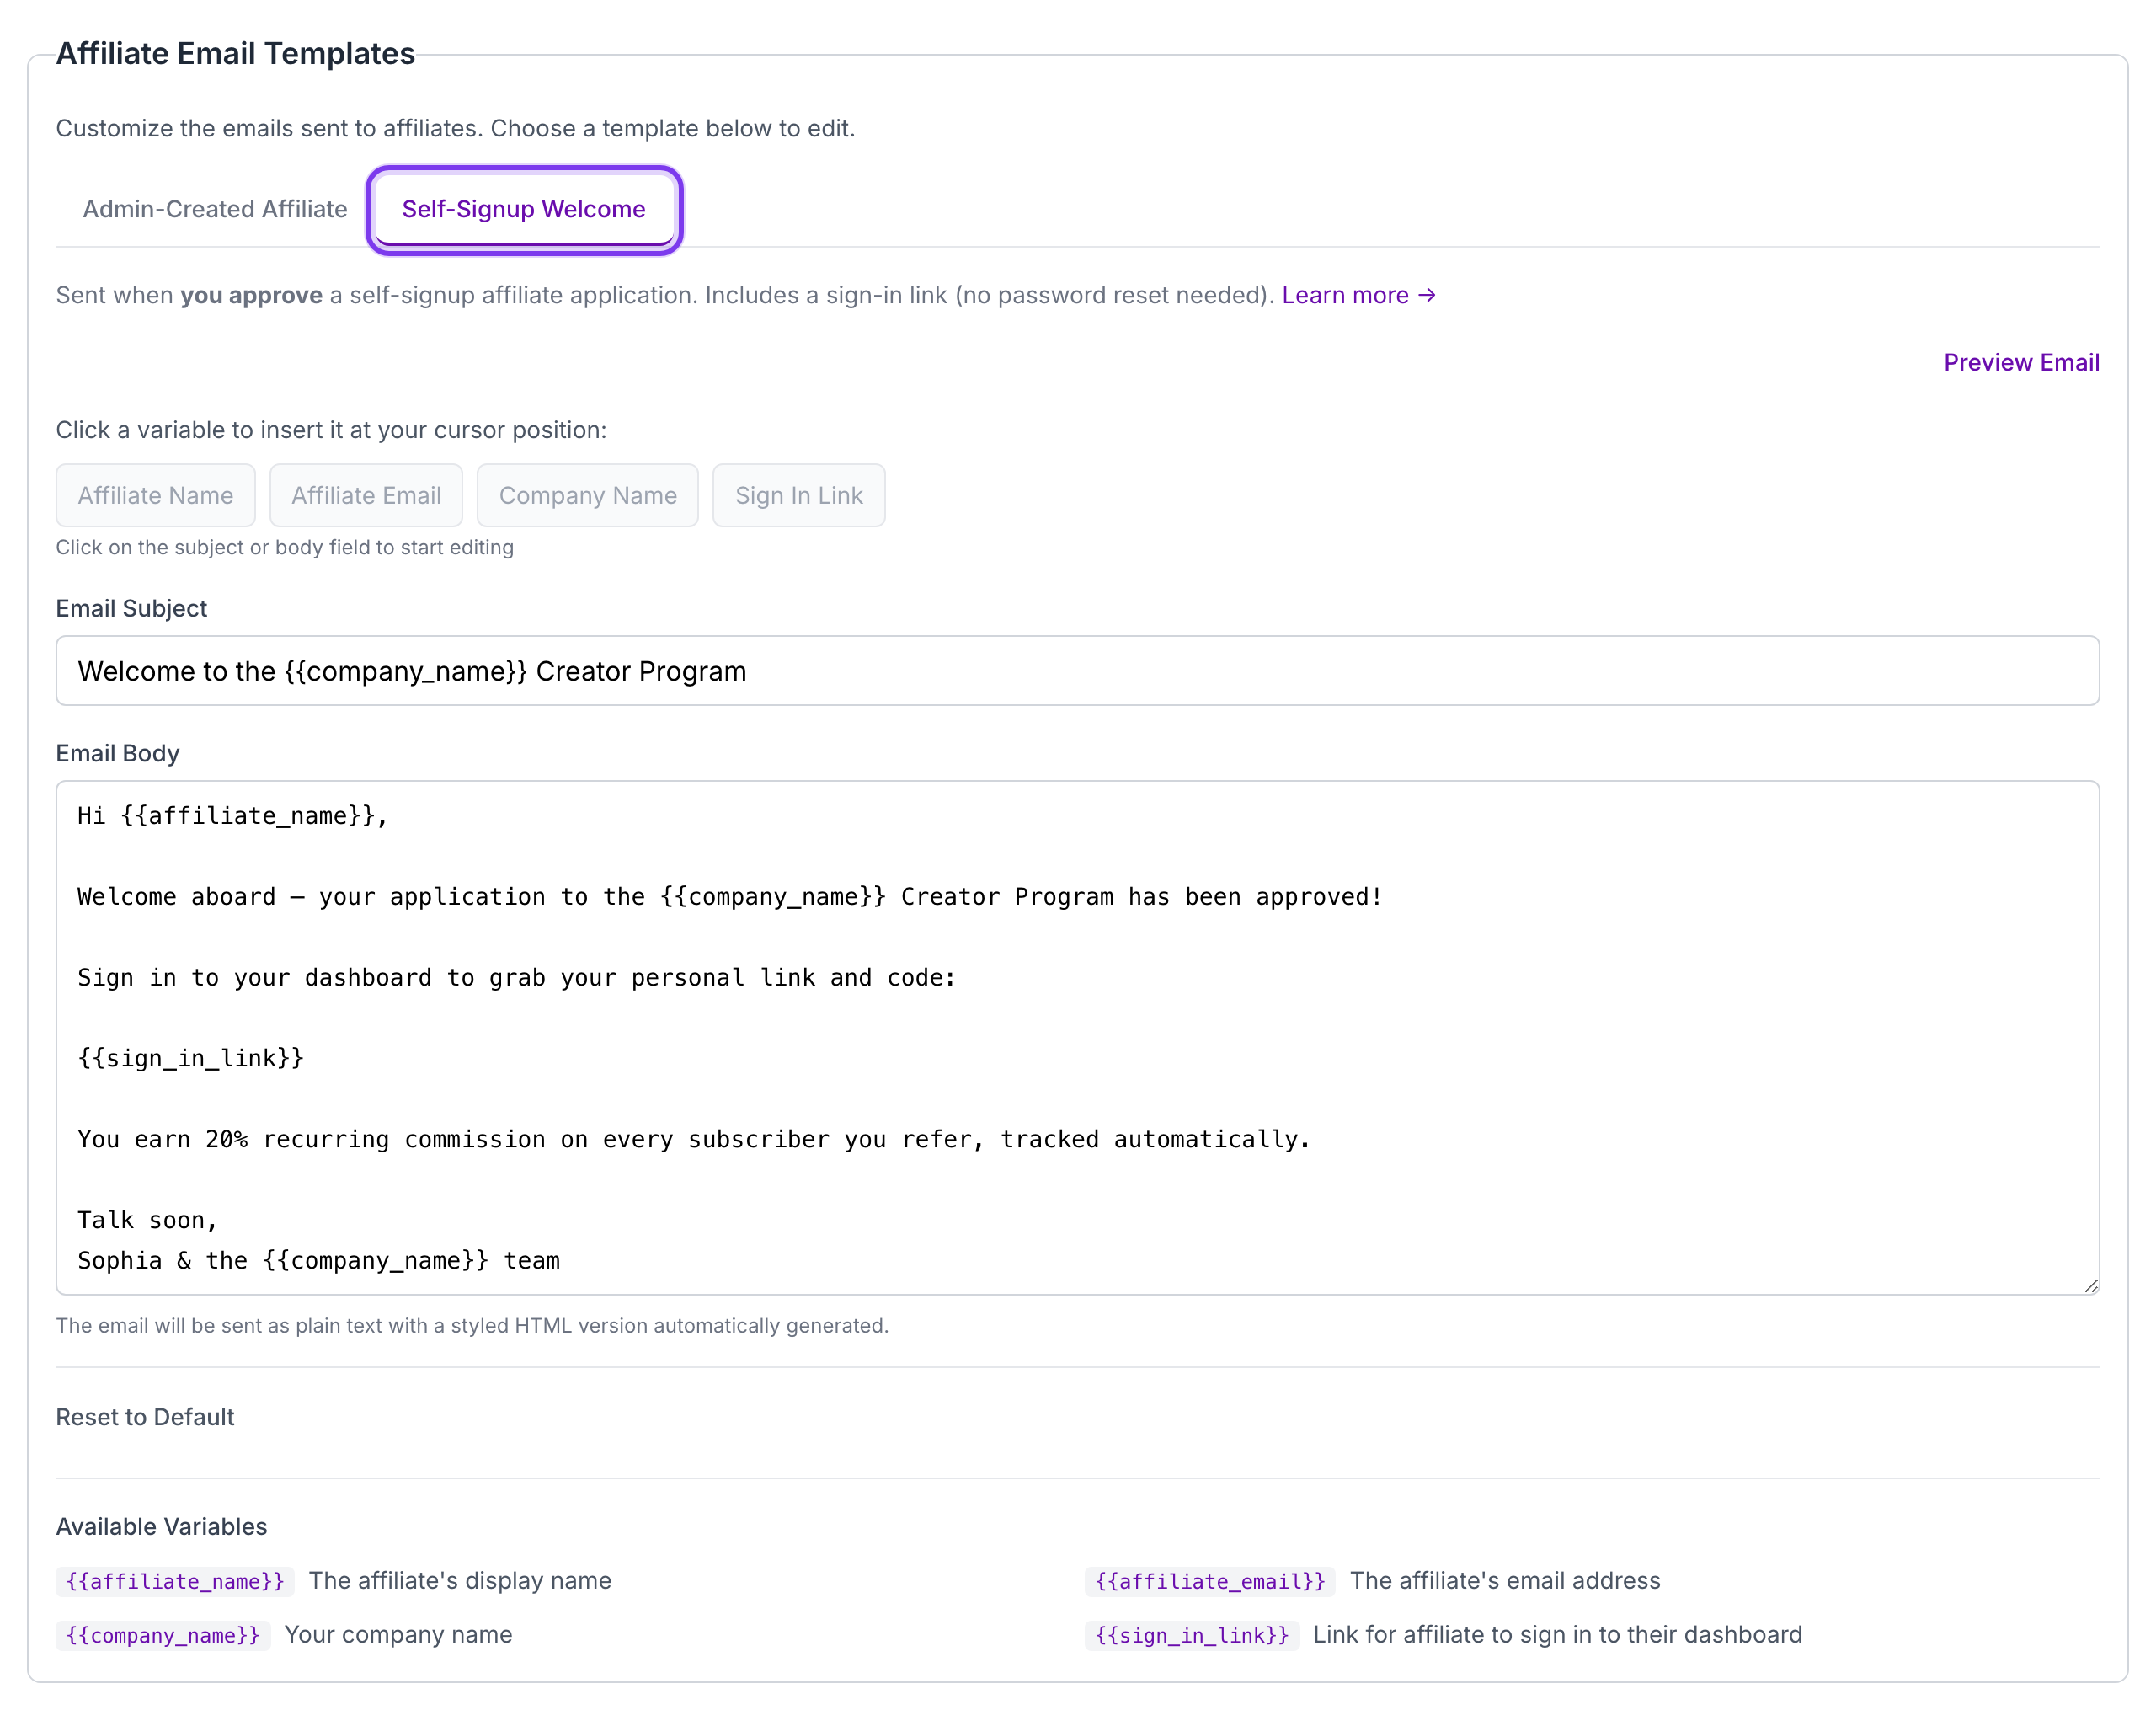
Click to view full size
What Happens on Rejection
When you reject a pending affiliate:
- Their pending application is deleted.
- No account or deep link is created.
- The applicant's email is not stored, so they can re-apply in the future if needed.
Final Notes
- The Branch.io method is best for automating deep link generation.
- The comma-separated list method is simpler if you already have deep links.
- Use custom deep links if your affiliates already have their own links from another provider — this bypasses the deep link pool entirely.
- Make sure deep links are unique and not already assigned to an existing affiliate.
- Enable Require Affiliate Approval in Settings if you want to manually vet affiliates before they gain access.